TRANSFERING IMAGES ONTO FABRIC: creating book covers

I have been experimenting with an alternative method to mod podge. (a glue product used to transfer images and other things to materials) With a bit of exploring on the Internet PVA glue does a similar thing. I wanted to come up with ways I could collage and decorate my hand bound books and covers for the greyboard. I went through a chinese pattern book I have and photocopied the patterns onto printer paper and collarged them using pva glue pattern face down onto the fabric, then left to dry to that the ink transfers into the fabric then  wetting the paper with a sponge rubbing gently I wore away the paper, to reveal a slightly rustic aged looking pattern. I really like this effect an it makes the fabric ridged and waterproof making it perfect for book covers.

I was thinking if this techniques works photocopy paper, I could create my own designs to transfer onto the fabric.

MOVING HOME: making changes to project

As we were all told to gather our things and to stay at home due to the outbreak of coronavirus, I was quick to gather all necessary materials (albeit the basics) I would need to continue developing my experimentation and project at home, I saw this as an opportunity to get a bit more experimenting with materials I have to hand and the access I have to around me in the countryside. I want to start use natural materials found on walks and in my garden and in the cupboards to make paper and covers for bookbinding from using the basic paper making set up I have.

Being experimental with what I have to hand
For the paper making I have bought myself a frame to make the paper and a plastic box to  make the paper pulp and blend the paper using a handheld soup blender (…we will see how this works out!). after that i will need to press the paper so i want to make a press similar to the ones I use at uni using plywood and nuts and bolts, this is essential for paper making as it squeezes and flattens the paper, I will then need to source clothes for layering the paper.

With the bookbinding I talked with Tom from the print room to discuss what materials i would need to continue to bind books.  he gave me some book binding thread, some mesh to reinforce the spine and some card to cut down to size to make the pages. I bought myself a awl and a flat edge ruler with a rounded edge to use as a book binders bone.

I am hoping I can continue to make in a similar way to at uni but with a few tweaks to the techniques and materials.


PAPER MAKING: with fabrics

I was pleased with my flower paper made using torn recycled cartridge paper BUT it was challenging to get the consistency in the quality of each sheet, resulting it paper sheets with holes or thin areas, this is a nice tissue paper like quality but the fradgility makes manipulation and binding challenging and is not what I wanted to achieve this may be because I got the ratio of water to pulp wrong and may need to thicken the consistency to make the paper more ridged.

I wanted to experiment with paper and fabric blends, to make a hand made watercolour paper. To make this I shredded pieces of recycled calico cut ofs from the textiles room, then pulped it with a ratio 3:2:1 water, fabric, and paper.

This once pressed dried and rolled became a soft durable paper compared with the fragile flower paper. Almost fabric like in its quality.

As a result of this experiment I want to undertake more paper making continuing with alternative fabrics and materials such as wool and felt to experiment with texture value and explore the best options for book binding at a later stage.

USING THE LETTERPRESS

IMG_2371IMG_2372
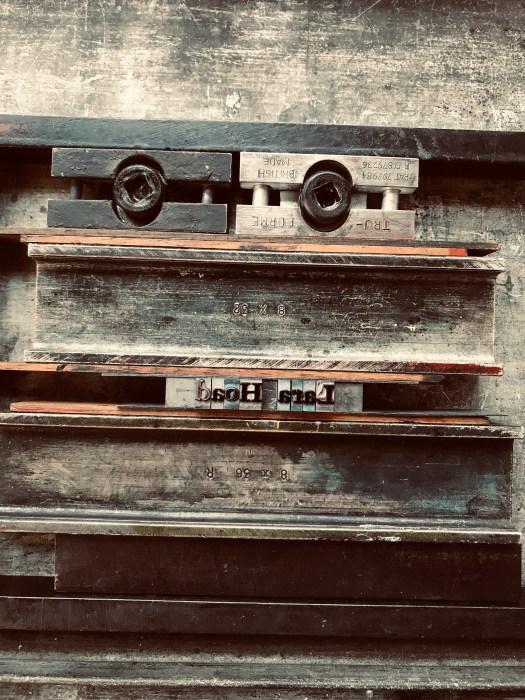
I attended a letterpress workshop to widen my knowledge of the facilities in the print studio and to equip me with the skills to print onto my work if I want to explore this further. There was a wide variety of typefaces available and if I were to do this again I would be more experimental with the type I use.

Letterpress workshop
  • Use frame and metal ruler
  • Make sure lead is longer than the sentence
  • assemble letters on ruler over the lead piece
  • Notches must line up
  • upside down left to right
  • Spaces are shorter than text
  • Piece of Lead on top
  • Pinch the type between the lead
  • Coins go at the top (things of lead with holes in)
  • Fill surrounding gaps with lead and a slice of wood mirror it the other side
  • Tighten the keys evenly
  • Check the type is tightened in the frame
  • Text should be flush- if not tap with a hammer with wood over text
  • If doing more than one line of text use little spacers between the text and the words and lines
  • Printing place gram in machine two notches on frame must line up
  • Ink goes on top plate
  • Use ink in guns with yellow handles
  • Oil based ink – comes off white spirit
  • Remove cap from ink squeeze onto glass roll evenly
  • Roll onto printing plate not loads on plate
  • Leave packing on frame
  • Roll letters with ink pull handle down
  • Lay paper
  • Press handle until tight
  • Don’t use paper that’s too big
  • Ink will be really wet 2-3 days to dry
  • Use white spirit to remove ink. white spirit is in can

Problems I faced: I found this workshop and technique really challenging as you have to visualise the letters back to front and line them correctly. This took me a few attempts as I managed to get bs ds and qs mixed up. I was trying to spell my name. After several attempts I had correctly arranged the letters. If I were to do this again I would print the text back to front as a guide as it would speed up the process.

This is a really interesting technique with very satisfying outcomes. The print is not only aesthetic in itself as a perfect print it has a slight embossed effect on the paper making the type more prominent and significant this could have a really lovely effect on hand made paper.


PAPER MAKING

Using a paper method taught to me in an induction I followed the steps to create paper using torn pieces of recycled cartridge paper and flowers petals and lichen. This is to experiment with combining materials into the paper, I am hoping the petals will bleed slightly to create a watercolour like effect on the paper.

Paper making:
Ripping paper first
Blitz with a almost full jug of water,
Aim to make 8 jugs couple glugs of pva glue,
Lay folded jay cloths on the tray on the wood
Use the frame and submerge in pulp and drain until water Goes
Lay on the stack- push down to release- jay cloths between each layer
Pressing it- 4 washers on bottom 4 washers on top with bolts
Press with 4 washers and nuts
Screw alternate corners leave to drain for half an hour
Once finished sieve pulp in a bucket over the sink
Unscrew and peel layers of cloth off, hang in dark room on cloth

problems I came across: I struggled to maintain a consistency that created uniform sheets, i discovered towards the end of my paper making this was down to the added ingredients such as flowers ect, making the paper harder to release from the frame causing sections to rip and tear. I know this isn’t the best result to have had and I was a little disappointed with the amount of complete sheets I produced. but i am still satisfied with the paper i produced, I like the authenticity of the inconsistency, this may be interesting contents to a book? i’m not striving for perfection but I feel the more I practice the  better the quality of the paper will be.

I want to continue making papers and explore using alternative materials for the paper and more traditional ingredients, this project gives me the perfect opportunity to explore the possibilities of paper making and then binding into books.


CREATE YOUR MARK: project ideas

Continuing on from my field project I have developed an interest for the process and exploration of book making and paper making.

As part of this project I want to explore the uses of the traditional techniques involved in making books by hand including (binding, paper making, letterpress and printing as well as embossing and engraving) as well as introducing and researching modern alternatives and artist books.

As my interest stems from a short 5 week project, Behind the barcode. I was unable to develop my ideas fully within the time frame, having a longer spending project I want to take inspiration from other artists and traditional methods and techniques in both bookbinding and paper making and combine them with modern takes considering eco friendly and sustainable aspects within the design of the books.

I want to use a variety of materials to do this, some natural materials when making the paper such a petals and other plant matter, possibly exploring natural dying. Leather and recycled materials, hard and soft back books as well as surface decoration using sculptural techniques, embossing and engraving.


BEYOND THE BARCODE: challenges overcome

During this project I explored the paper making and book binding processes alongside my business plan. for me this is a totally new experience learning business concepts and the behind the scenes working of businesses and everything that needs to be considered.

The thing I found most challenging was how to make a fairly basic hand made product appeal to a higher market demographic, working on the feedback during my pitch I have tried to tell a story of the product and the company so that people can gain better understanding and knowledge of the brand and the types of customer I want to appeal to. One way I explored this was designing a higher end packaging that when people purchase or receive the products they are well presented and look luxury, hand made and special. I want people to be happy to pay a higher price because of the service, quality and look of the product they are receiving.

I have struggled to decide on an appropriate age of customer for my product. I concluded that these products sit within an age range of between 30-45, although saying that I believe there is leverage with this depending on what and who the product is intended for.

Considering the pricing my products has been challenging as these are practical things… and they are only made from paper. so how much would people pay for a bit of paper realistically. Looking at my research into competitors i have found people tend to pay that little bit more for a bespoke service and the personalized, wedding books and photo books can range between anything from £15 – £130+. Considering the cost of the production, my time making the products, the packaging, the types of stores I want to sell to (boutiques, farm shops, garden centres and local independent high end shop) the price needs to be appropriate to the customer demographic and age. Therefore I feel an appropriate price range would be between £20 – £100+ obviously this includes bespoke services and is dependent on what the customer wants and how long it would take to make. (These are only rough estimates as I haven’t figured the precise costings but this is what I would feel comfortable charging people for a hand made special occasion product).

BEYOND THE BARCODE: Maslow’s hierarchy of needs

To make more sense of the customer needs and my needs for a business I wanted to apply the hierarchy of needs theory to my work. The triangle table read from the bottom up consists of physiological, safety, love and belonging, esteem, and self-actualization, to explore the needs of a person/ business.

maslow's hierarchy of needs five stage pyramid

Physiological needs- a studio, food, money, salary, financial stability.
Safety needs- revenue, profits, good management of money, production and time keeping.
Belongingness and love need- good work social mix, work from home, successful product.
Esteem- product accomplishment, sales, profit and popularity, customer satisfaction.
self actualization- successful product, established brand, returning customer, luxury products, sustainable business and product


BEYOND THE BARCODE: making it more luxury

I want to push the luxury within the brand and the way I wanted to do that is to create a connection with the customer and push the hand made qualities of the product and the brand values so that people can understand and relate to the products and this is a more personal touch.

Our story

The Crafted Paper Co. creates unique handmade papers and bound books. These are created by maker Lara Hoad and formed from recycled and reclaimed paper and cotton from industry, pulped with dried flowers and natural materials then formed using a mould and deckle, dried and rolled to make a high-quality luxury paper.

All our books are bound using waxed linen thread and can be personalised to your preference. Choose from a range of colour combinations, finishes and flower papers and personal touches like an embossed name or quote to make a special bespoke book to treasure or to use for a special occasion.

We provide book collections each unique and slightly different ranging from photobooks, wedding guest books, journals and sketchbook.

Lara is passionate about providing a bespoke service with the best quality hand made products and materials and provides services and kits so you can learn a new craft skill and take away a newfound love for papermaking and bookbinding.

For Any queries contact Lara Hoad: 07488339543Lara@thecraftedpaperco.com

Another way I want to push the luxury side of the product is through the packaging, this is the first thing people will see if they purchase the products offline and the last impression people will have as they leave a store that sells the products.

The packaging is to be made from recyclable cardboard and will have the logo printed along with a wax stamp. The product will be wrapped in tissue paper and tied with raffia before being placed in the box.

In store the products will be displayed with a packaging sleeve with the brand story (above) wrapped in tissue paper and raffia and me stamped with the wax stamp.

This is to make the product appeal to the high end demographic, makes the customer feel special and fits the aesthetic of the product as well as protecting it when being transported.


Design a site like this with WordPress.com
Get started