previously during a book binding workshop I used manufactured cartridge paper. as this project grew I was keen to use my own hand made paper for this stage of the book binding process. as i had to move home from uni I have basic facilities in order to make the hand made paper ( basically i had to make do with what I have: a handmade press, a cheap mould and deckle and no roller) therefore after speaking to Pip I decided to purchase handmade paper so I could start making the handmade paper books. ideally i would have wanted to make these books using my own hand made paper but given the situation i have been struggling to get the consistency in the paper to make about 20-40 sheets so for the sake of practicing the binding technique thought it would be better to purchase it of Khadi.com recommended by the artist I contacted.
Using the khadi paper and Tom’s step by step pdf, I followed his instructions as well as other sources I found online to basically self teach my way through making a book. although I have previously made signature hand bound books I have always done it with cartridge paper and guidance form a tutor so was very nervous to do this.
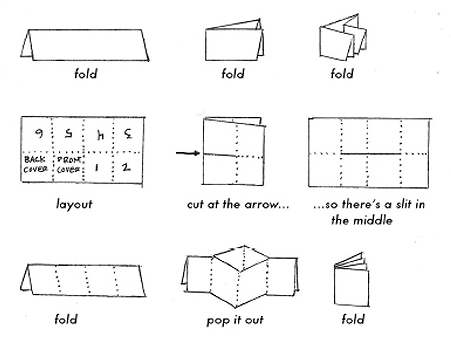
This was the step by step stages of the 5 signature book making process using 150 gsm handmade Khadi paper.
I used:
needle
bookbinding waxed thread
10 A5 sheets of handmade white Khadi paper
bookbinding glue
scrim
awl
ruler
I also wanted to make a more slightly more advanced book that would have been traditionally made on a bookbinding sewing frame, using cord.

Bookbinding.co.uk. 2020. Tradition. [online] Available at: <http://www.bookbinding.co.uk/tradition.htm> [Accessed 11 May 2020].
as I don’t have a frame to use I found a way of doing it by hand and adding head bands using a tutorial on YouTube.
I found the head bands particularly fiddly and confusing when following a step by step image tutorial so I found someone who videoed the process and uses an easier method that glues the cord in place with tissue paper making it much less fiddly. Headbands are made using cord and silk threads as a decorative way to strengthen the ends of the book.
The spines I then glued with scrim and applied some scraps of hand made paper to strengthen the spine, traditionally the makers would write hidden messages in the spines of their books. I will talk about this in another post.
I actually find these books as they are now rather beautiful, Its a little bit of a shame this is covered in the final process. it is quite nice to make these hidden bits decorative although they will not be seen.
Although this process did take a bit of getting used to and more patience and focus, with the added fragile nature of hand made paper that has a tendency to tare. I enjoyed this process and as a result of practicing I can now continue using this handmade paper as I found it fairly reliable.
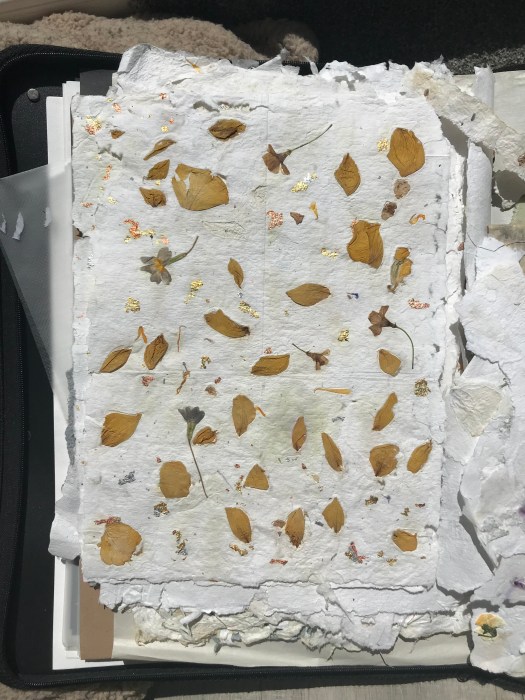
Moving Forward I am going to make a couple of books with more multi signature sections in and going to decorate the end papers, these would traditionally be marbled or a decorative patterned paper but i am keen to experiment with using my own decorative pressed flower paper.


 pages 5 and 6: This is part of the binding process, the head bands and scrim used to decorate and reinforce the spine. As Well as the greybeard cover with an eco print.
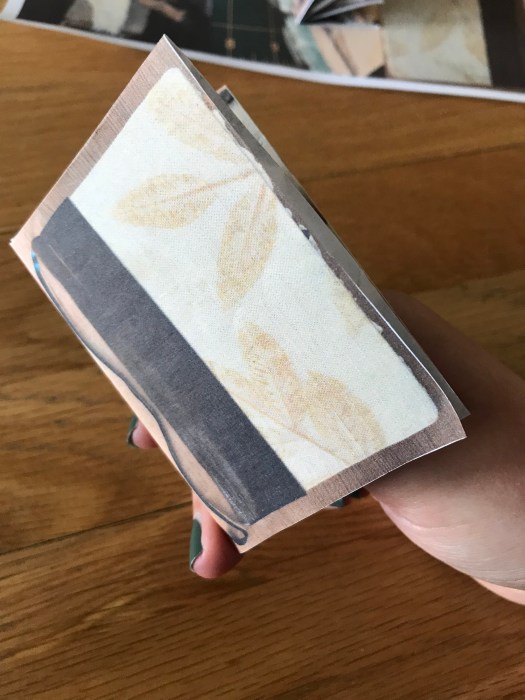
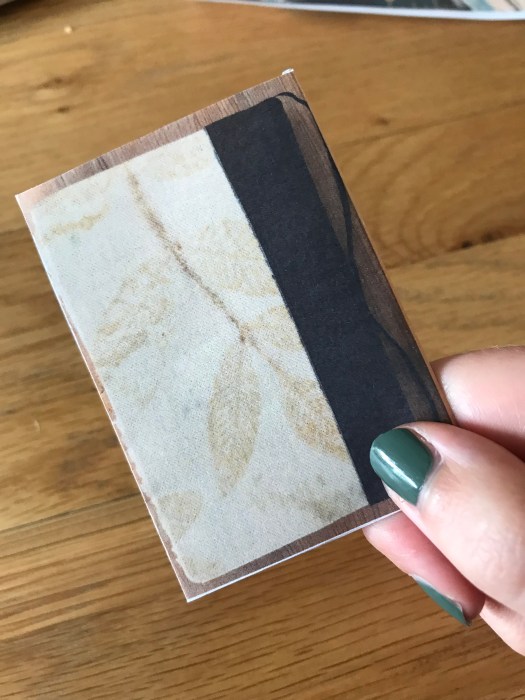 Back Cover: showing the reverse of the eco print book. made using walnut leaves steamed between an iron.


/https://public-media.si-cdn.com/filer/e0/bb/e0bbede1-bfeb-43c1-9665-bc0d0b485826/binding_image.jpg) @jasondaley608, F., 2020. X-Rays Reveal “Hidden Library” On The Spines Of Early Books. [online] Smithsonian Magazine. Available at: <
@jasondaley608, F., 2020. X-Rays Reveal “Hidden Library” On The Spines Of Early Books. [online] Smithsonian Magazine. Available at: <


